

How To Edit Image In Photoshop
How To Edit Photos In Photoshop
Photoshop is one of the most powerful paradigm editing programs money can buy. With some of the best tools and layer adjustments around, there's no reason not to use this plan. Now the trouble is, if y'all've tried to edit a photograph in Photoshop, you've likely felt a little lost. With an overwhelming amount of features, it's difficult to know where to begin. Luckily, using this simple x step method, learning how to edit photos in Photoshop has ever been easier.
To professionally edit a photo in Photoshop, follow this 10 step recipe:
- Import Your Photos
- Ingather And Straighten If Necessary
- Create Base Exposure And White Residual Adjustments With Camera Raw
- Remove Any Distractions From Your Photo With The Clone Stamp Tool
- Improve The Exposure And Contrast With A Curves Aligning Layer
- Make Your Color Adjustments
- Create Spot Adjustments With Layer Masks
- Contrivance And Burn
- Sharpen Your Photograph
- Export Your Image
By following these ten steps, it's easier to know exactly what to do adjacent. With a clear programme of activity, Photoshop feels far less intimidating, and you lot tin go from point A to B in less time. At present let'southward walk through each of these ten steps together!
How To Edit Photos Professionally In Photoshop – Step By Pace
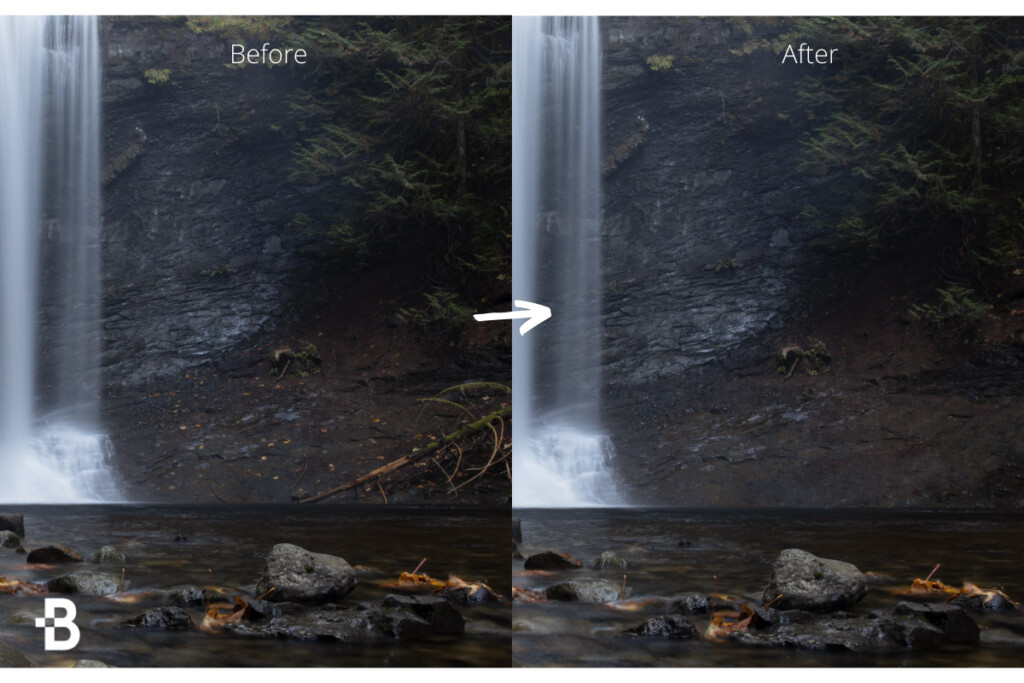
The photo I'll exist using in this tutorial is a waterfall photo I took recently. Later going through the 10 step editing recipe, nosotros tin can take this photo to a whole new level.
If you lot desire to follow along, I encourage you to bring up a photo of your ain, and so we can work through this together. Since every photo you edit volition require different adjustments, I'll only be sharing my full general steps. The exact settings I employ for each tool are irrelevant since they volition look different on your images.
The idea here is to give you a roadmap to follow towards a workflow for photo editing in Photoshop. This workflow is one I've developed over the years and notice to be the most effective at yielding consistent results!
Hither's how it's done.
1. Import Your Images
This may go without saying, but you'll need to import your photo into Photoshop before anything else. At that place are two dissimilar means to do this, depending on where your photo is stored.
Option 1: Opening New Certificate
The first option is to open your photo direct into Photoshop from your estimator. To practise this, simply printing Command + O (Mac) or Control + O (PC) on your keyboard. Alternatively, you can click "Open" on the Photoshop start screen.

Since this choice takes a photo directly from your reckoner into Photoshop, you'll demand to call back to salvage your projection after on. Without working out of another program like Lightroom, Photoshop will crave you to choose a place to save your projection on your estimator. You'll exist prompted to practice this when y'all try to save your projection.
There isn't any downside to this, but it's easier to get your projection files disorganized. When saving Photoshop projects, make sure to have some kind of folder to social club things systematically. That way, they're easy to find later!
Option 2: Opening A Photograph From Lightroom Into Photoshop
If your photo is already imported into Lightroom, you tin begin editing the same file in Photoshop. Merely right-click on your desired photograph and select Edit In > Photoshop.

From here, your photo will automatically open within of Photoshop and volition be ready to work with. The difference with this method is that when yous salve your project, the new image will announced in Lightroom.
Rather than having to organize your Photoshop project files, Lightroom volition do it for you by storing the projection file in the same place as the original image.
2. Crop And Straighten (If Necessary)
If your photo looks a little crooked or you demand to adjust your framing, using the crop tool will fix all your worries.
– Using The Crop Tool
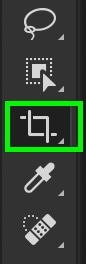
The crop tool tin be quickly accessed by pressing C on your keyboard or finding it in your toolbar.
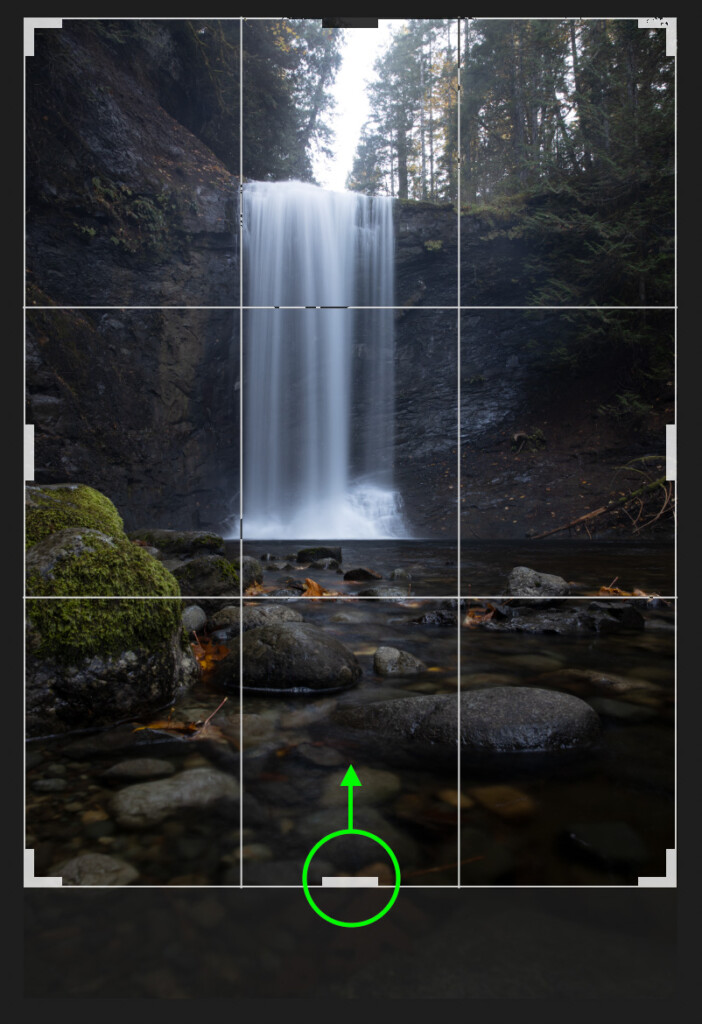
One time selected, you'll notice a white box around your image and your tool settings in the upper bar. For full general use, make sure your crop preset is ready to "Westward x H 10 Resolution." While using this crop preset, y'all tin can freely adjust the size of your crop.

With that said, you tin can also use the "Original Ratio" preset if you need to go along the same aspect ratio as you lot ingather.

Next, make sure the "Delete Cropped Pixels" option is turned off . That way, when yous crop your photograph, all the image data outside of your crop volition still be there. This is the best way to crop non-destructively while giving you the choice to modify your listen afterward.

To crop your photo, click and drag on any of the outside edges of your crop overlay. This volition reposition your crop and darken any areas of your photo that volition no longer be visible.
The thought here is to crop your photo to better focus on your subject or quickly remove distractions effectually the edge of the frame. If you don't feel like you need to crop annihilation in your photograph, then that's totally fine.
It'south just important to consider whether or not you need to crop at the beginning stages of every edit.
– Using The Straighten Tool
Next comes the straightening tool. This tool is perfect to easily correct slanted horizons or conform your photo to align with a certain edge. In most cases, you'll utilise this tool along your horizon lines.
The straighten tool can be accessed in the crop tool settings bar at the top of your screen. The icon is a minor bubble level with a dotted curved line above it.

In one case active, merely click forth the horizon line and drag outwards. As you drag, a line will exist created to base the straightening corrections on. Exercise your best to align this to match the bending of your horizon or edge. That way, Photoshop will know exactly what edge you lot want to be perfectly straight!
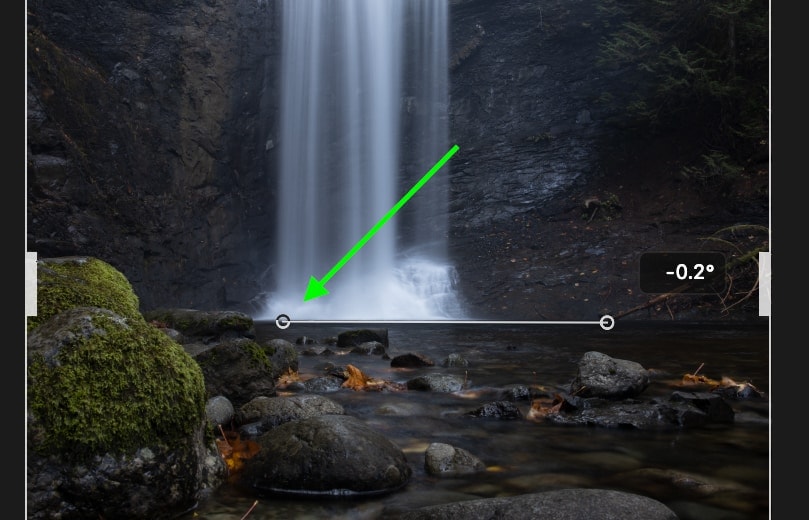
After letting become, your image will be automatically straightened to friction match the line you made.
If your photo was very kleptomaniacal, you'll notice a lot of your epitome may exist cropped. To adjust for significant bending changes, information technology will just piece of work by cropping and punching into your photograph in some cases.

That's why it's e'er best to get it right in-camera!
Why Crop And Straighten As The Starting time Footstep In Your Edit?
Making certain your photo doesn't look crooked is crucial to gear up before anything else. It's possible you'll exist wasting your time adjusting parts of your photo that may not even be included later you crop. To stay one stride ahead, ingather and straighten your photo from the beginning, so all that'due south left is to edit exposure and colors!
3. Add together Base Adjustments With Camera Raw
Camera Raw is a handy tool in Photoshop that operates like a mini Lightroom. In this tool, you lot take all the typical white balance, exposure, color, and spot adjustments you lot could expect in a photograph editor. The beauty of Photographic camera Raw is that it provides an efficient way to create base adjustments to your photo.
Base adjustments are the general changes needed to remainder out the exposure and white residue in your photos. In most cases, you'll accept an exposure that favors either the highlights or shadows. With base adjustments, y'all tin can remainder these out to create a better-exposed photo to work with.
– How To Open Photographic camera Raw
Before you open up Camera Raw, I strongly suggest you change your prototype layer into a smart object. That way, you can ever become back and change your Camera Raw adjustments if need exist. You can learn more than about the powers of smart objects here.
Since we nonetheless have only one image layer, let's outset duplicate it by pressing Command + J (Mac) or Control + J (PC). With a second background layer, you can ensure to edit non-destructively.

Side by side, right-click on your new layer and select "Convert To Smart Object." Once converted, your layer thumbnail will have a smart object icon displayed on it.


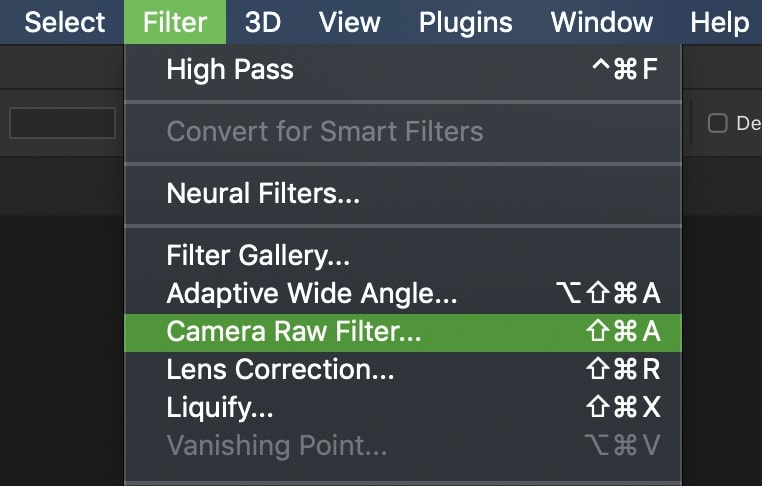
Then go upwardly to Filter > Photographic camera Raw Filter, to open your selected layer into Camera Raw.
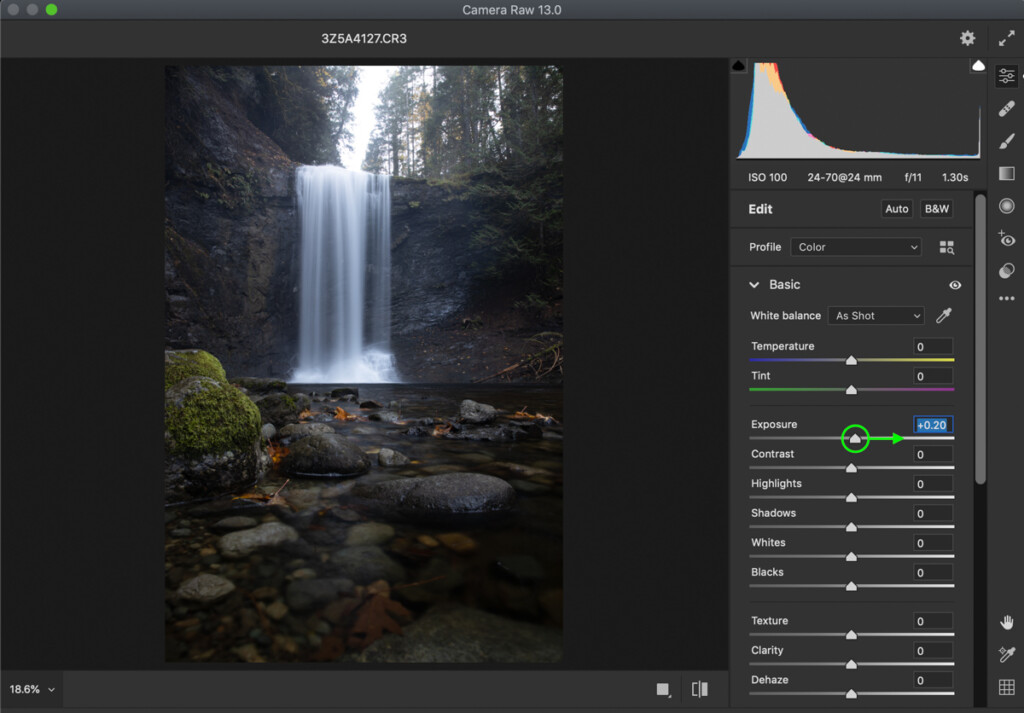
– Editing Exposure In Camera Raw
If you've spent some time in other editing software such as Lightroom or Luminar, virtually of what you see hither volition exist familiar. Using the exposure, highlights, shadows, whites, and blacks sliders, you can get things started.
First off, increase or decrease the exposure slider to create a nice balance between the shadows and highlights. Ideally, you lot want to exist able to run across the details in all exposures clearly. You can use the histogram at the top of the editing console to assistance yous out.
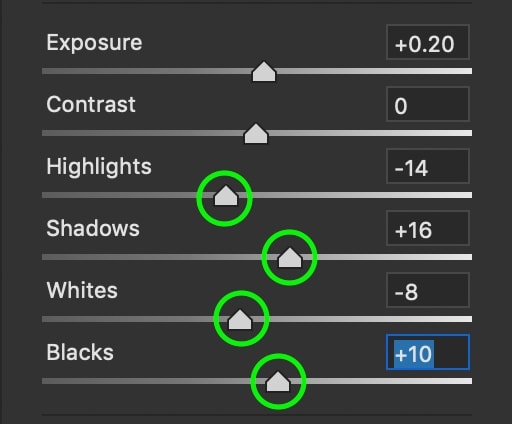
Now piece of work through your highlights, shadows, whites, and blacks sliders. Rather than changing your entire exposure, these sliders simply touch sure exposure ranges in your photograph. Since it breaks everything up, it's far easier to target specific parts of your photo.
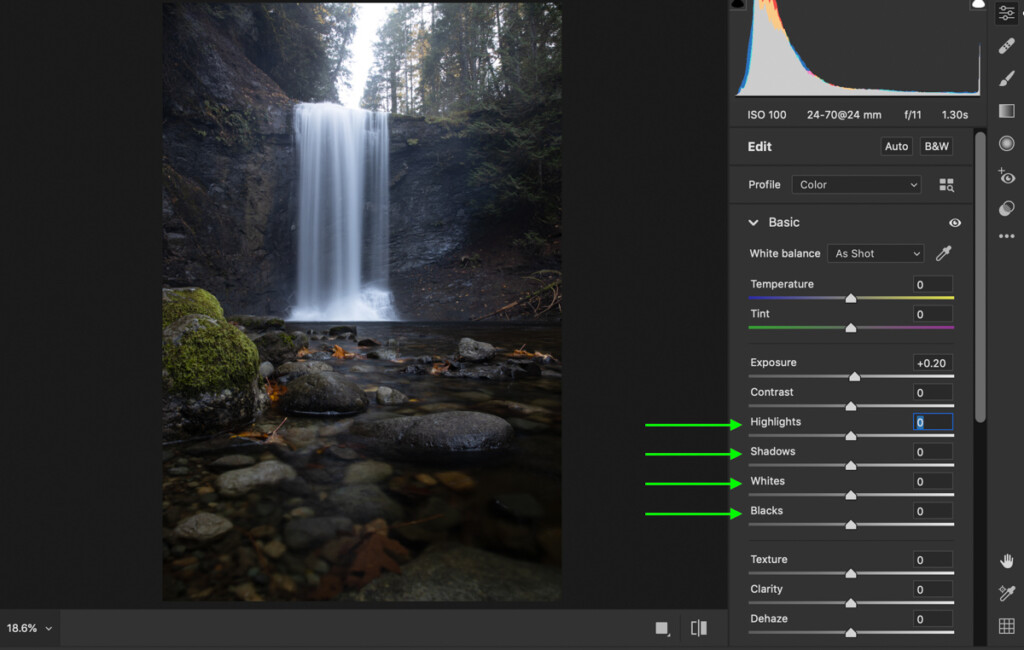
Continue to adjust these sliders to assist brand the brightest and darkest parts of your photo more than visible. The end event will likely look a little chip flat and low contrast, simply that's exactly what we're going for. That mode, you can add back contrast more creatively in later steps.
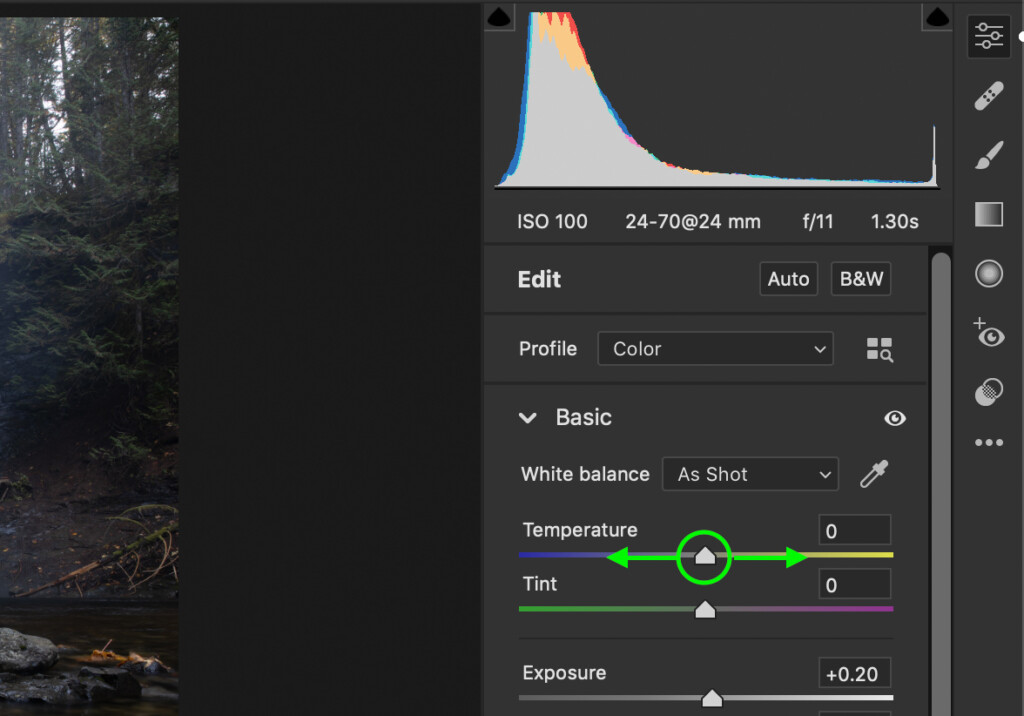
– Change The White Balance In Photographic camera Raw
Subsequently your exposure adjustments, make sure to adjust the white residuum and tint of your photo to await equally realistic equally possible. By making your white residual warmer or cooler, you can assistance to make the colors in your photos look better going forward.
To alter the white balance, simply motion the temperature slider left or right. Moving to the left volition make your white residual more than blue, while moving right will make it appear more yellow.
If you demand a certain area of your photo to expect 100% white, then click on the eyedropper tools above the white balance sliders. With this tool, you tin can click to sample any colour in your photo, and Camera Raw will adapt your white residual to friction match that specific expanse.

In most cases, just using your best judgment will get the job done when adjusting white residuum.
Later changing the color temperature, your photo might experience a little bit purple or green looking. Specially when shooting with an ND filter or polarizer, it's not uncommon for this to happen. Luckily you can quickly correct this with the tint slider. Just drag left or right to counter the hue you see in your photo.
Once you're happy with the adjustments you've made, click OK to exit Camera Raw.

four. Remove Whatsoever Distractions From Your Photo
With the base adjustments set, it's time to remove whatever unwanted distractions from the photo. This could exist something as small-scale equally a sensor spot to as major equally an entire edifice. Whatever you lot need to remove from your image, it can exist done with two elementary tools in Photoshop.
The Clone Postage Tool
The clone postage stamp tool is i of the best object removal tools in Photoshop. Rather than Photoshop automatically choosing where it thinks will work best, you become to manually gear up the sample expanse. This gives you more flexibility to work with patterns, complicated edges, or anything that typically throws off content-aware methods.
– Setting Upwardly The Clone Stamp Tool
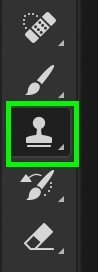
To access the clone stamp tool, printing Due south on your keyboard or find it in your toolbar.
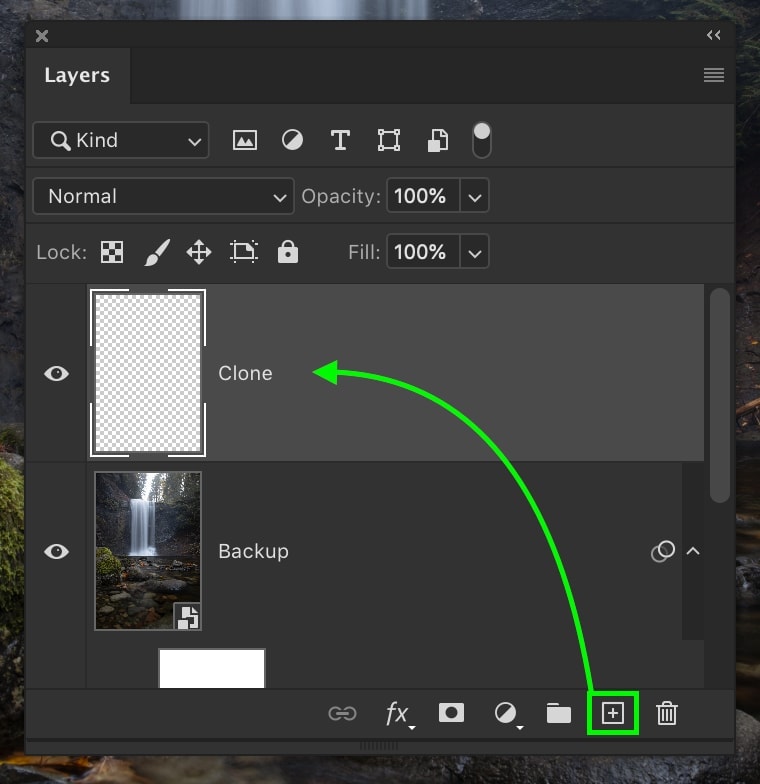
Next, create a new layer to brand your clone postage adjustments on. This way, y'all can continue to edit not-destructively.
In your clone stamp settings bar, brand sure your way is set to normal, the opacity and flow is at 100%, and your sample is fix to current and below.

If you've never worked with the clone stamp tool, it operates a lot like the regular brush tool. The just divergence is that it paints a sampled area rather than a solid color.
In most cases, you demand the new clone stamp surface area to blend in with the rest of your photograph. The all-time way to exercise this is with a soft-edged brush.
Click on the brush preset picker and select the "soft round" brush preset.
Alter your hardness to somewhere betwixt 0% and 25% for more blended results with your clone stamp adjustments.

As for brush size, y'all'll demand to change this constantly, so only use the keyboard shortcut [ or ] to enlarge or compress your brush size.
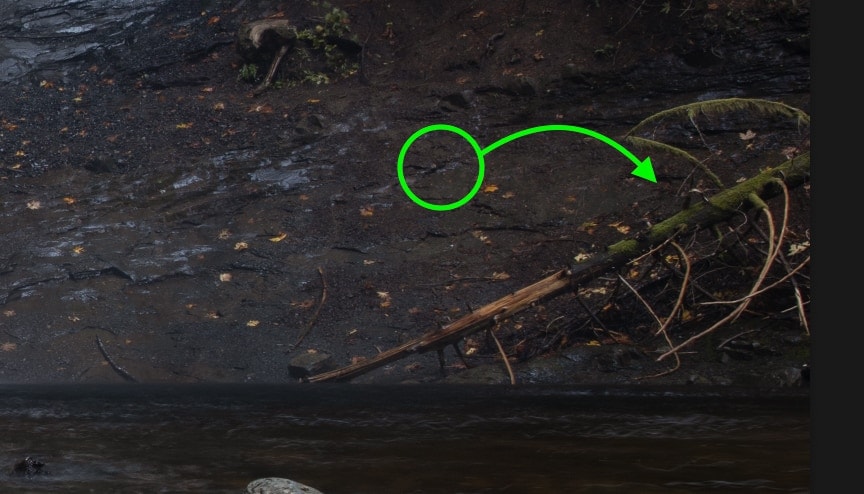
With all your clone stamp settings in order, it's fourth dimension to start removing objects from your photo. In this instance, I desire to remove the fallen tree on the right of my photo. Since at that place is a large empty area nearby to sample from, this volition be easy to remove.
– Removing Objects From Your Photo With The Clone Stamp
Whenever you try to remove something from a photo, retrieve you demand to detect an area to replace it with. The larger the area you can sample (in this case, the rocks), the easier information technology will be to cleanly clone out your objects. This tin can start getting complicated when at that place are patterns or null to fill the surface area with.

To get-go, I'll concur my Alt or Selection key (PC/Mac) and click somewhere on my prototype to sample. Wherever you sample from will be used to clone out your object. Since I am sampling the nearby rocks, it will blend well to clone out the fallen tree.
With a modest castor, I'll slowly work through the fallen tree. For the most realistic look, using a modest brush will make your clone adjustments appear less noticeable. It really pays off to take the time with a small-scale brush.

Every bit you lot continue to clone your photo, you'll need to continually resample new areas. In an ideal situation, y'all will sample as close to your object as possible, so the new exposure and textures lucifer upwards with the surrounding expanse.
Echo these steps until y'all've gotten rid of any distractions in your photograph. One time complete, rename your layer to "Clone" to aid stay organized.

The Spot Healing Castor
Not all objects need to be removed with the clone stamp tool. In a lot of your photos, you lot'll find that the things y'all need to remove are pocket-size. Since you don't need to be as specific with your sampling, these small objects can be automatically removed with the spot healing castor.
The spot healing brush works past using content-aware to intelligently discover a sample area to replace your selection with. All you need to exercise is paint over an object y'all want to replace.
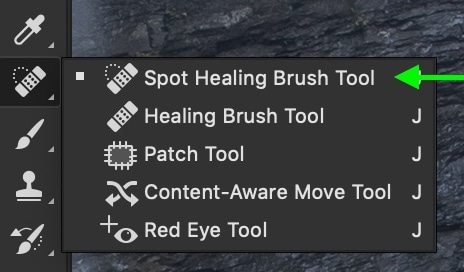
To admission the spot healing brush tool, printing J on your keyboard or observe it in your toolbar. If you don't encounter it, click and concord on the healing brush icon to reveal other tool options.
For tool settings, make sure you're using a brush hardness between 0% – 25% and a spacing of 25% brush preset, have the manner set to normal, and the type set to content-aware.As well, check off the "sample all layers" option to brand this tool a scrap easier to use.

You can once again modify the size of the brush with your left and right bracket keys [ or ].
In this photograph, there is a scattering of leaves laying on the rocks below the waterfall I desire to get rid of. Since they're so small, the spot healing brush tool will practice a dandy chore of getting rid of them.

By painting over the areas yous want to become rid of, a semi-opaque black castor will appear on your photo to represent your selection area. Photoshop will automatically replace this black brush stroke with something suitable to replace that section of your epitome with.
Echo this procedure on the same "Clone" layer until all of the small distractions take been removed.

Looking at the earlier and later on, using both the clone postage and spot healing brush tools, the photo looks much cleaner. These are two of the about useful tools for you to utilise in whatever type of situation.
5. Meliorate The Exposure And Contrast With Curves
Now all the starting piece of work is out of the way. The image has a balanced exposure, the distractions are gone, and now it's fourth dimension to add your artistic touch on. To start things off, we'll meliorate the exposure and contrast using a Curves Adjustment Layer.
– Creating A New Curves Adjustment Layer
To create a new curves adjustment layer, click the curves adjustment icon in the Adjustments tab.

You tin can also observe it past pressing the adjustments icon at the bottom of your layers panel. Both will go y'all the same result!

– How The Curves Aligning Works
If you lot're familiar with the tone curve in Lightroom, then this adjustment layer will feel very similar. In short, the curve is bankrupt up into four different sections represented past a filigree. Moving horizontally from the left, the columns correspond shadows (far left), darks, lights, and highlights (far right).

The white line represents your exposure beyond all of these sections. By clicking anywhere on the line and dragging up, y'all'll burnish all the exposure ranges together.
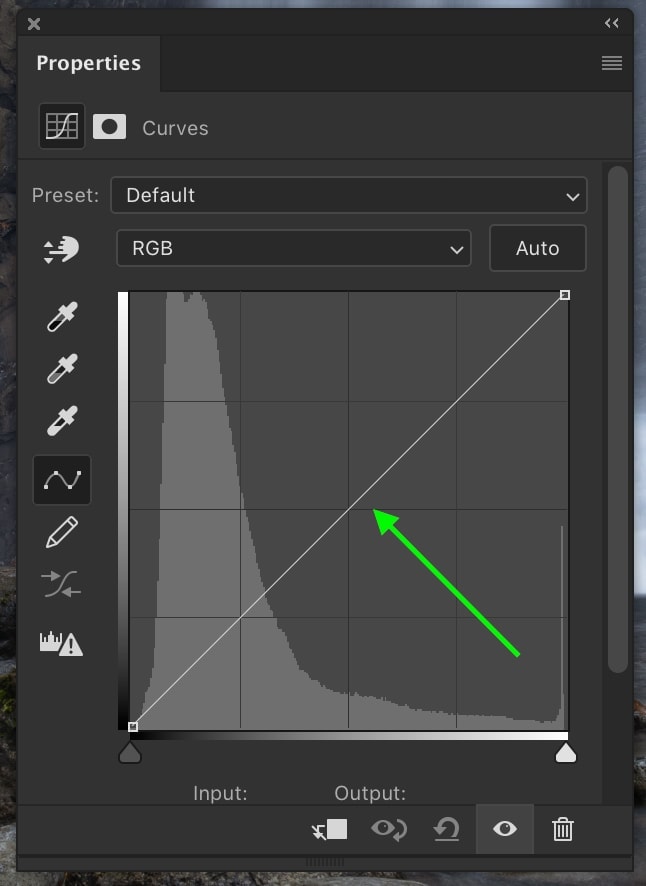

Meanwhile, if y'all drag down, you volition darken the overall exposure.
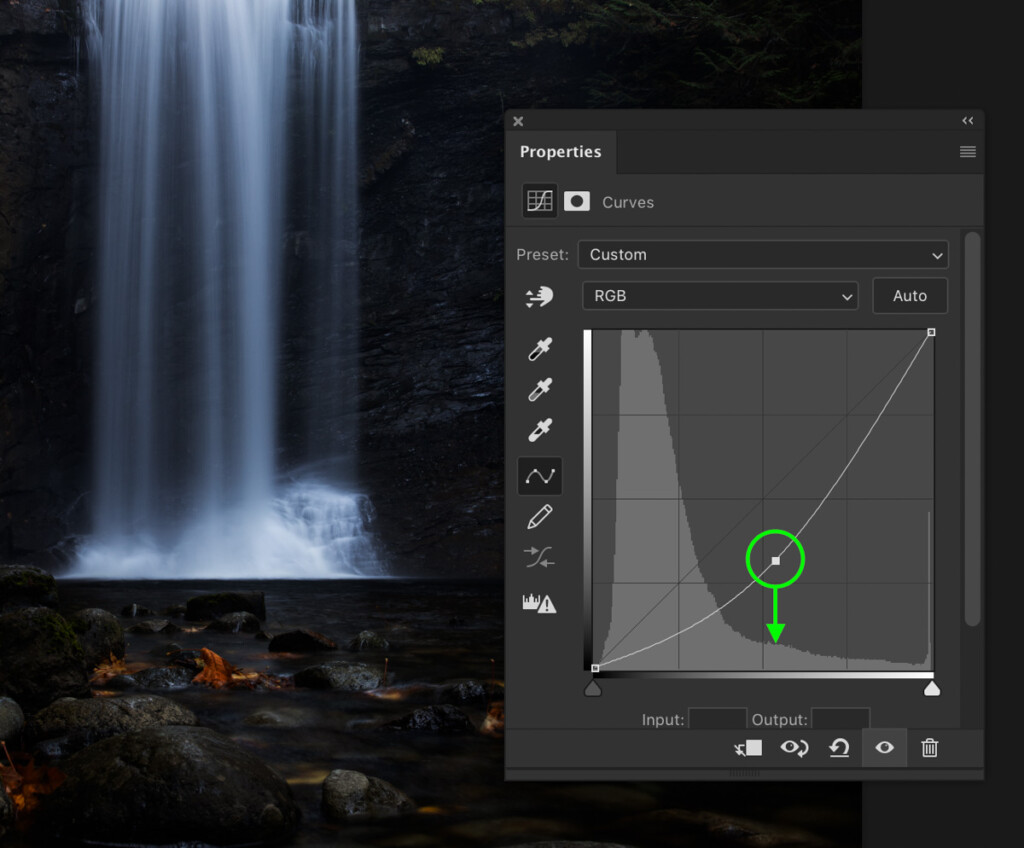
By clicking on unlike areas of your curve, y'all can continue to add together new ballast points to fine-melody the exposure and contrast. For example, you could bring downwardly the shadows and bring up the highlights to add together more contrast.
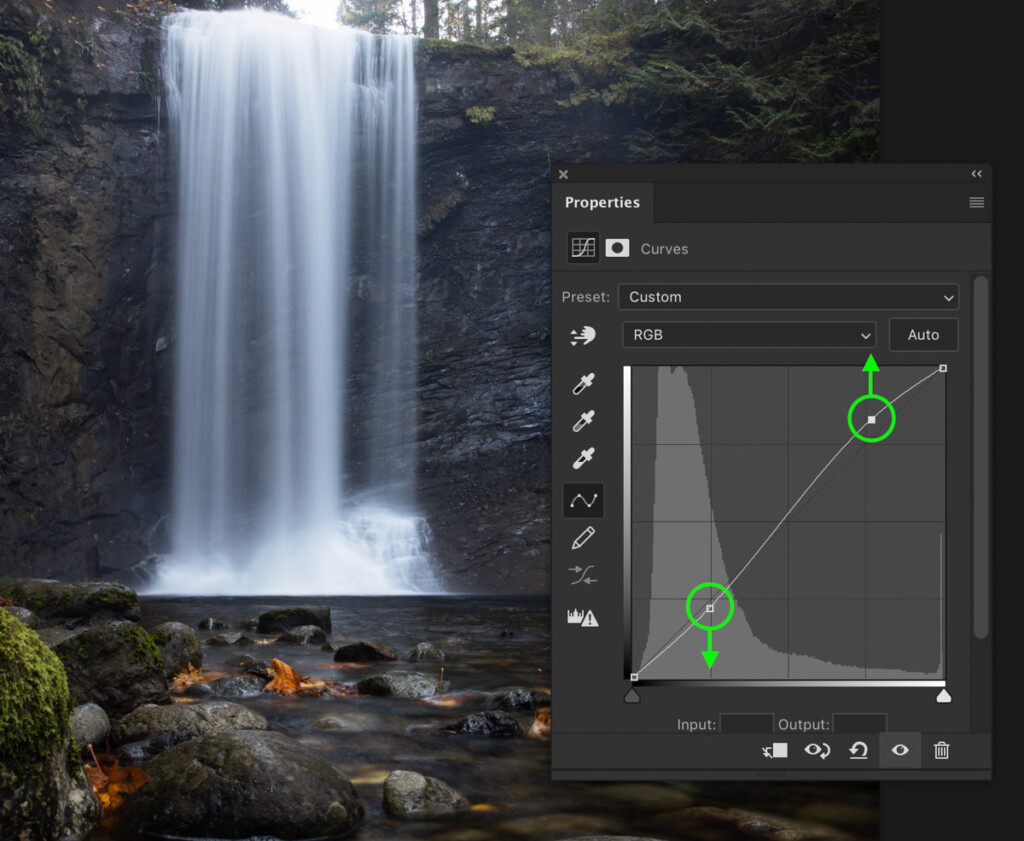
Play around with your curve adjustment to see what types of exposure and contrast adjustments all-time conform your photo. To get a wait at some different curve shapes, y'all tin use for specific effects, check out this post.
Once you're happy with the curve adjustments, you should have a nice general contrast and exposure adjustment. Something that ameliorate suits your editing style and makes the photo pop.

6. Make General Color Adjustments To Your Photo
After exposure and contrast comes color. There are a handful of fantastic tools in Photoshop to edit the colors in your picture with. However, the three below are the ones I detect to be well-nigh effective.
Adjustment one: Selective Colour
To create a selective color adjustment layer, click the selective color icon in your adjustments tab.

Yous tin also find it via the adjustment layer icon at the bottom of the Layers console.
This tool breaks downwardly each exposure and color value in your photo into their own tabs. By targeting different color tabs, you lot can ameliorate refine the exposure and tones of these areas. Although there are a series of color channels to work in, I observe using the blacks, neutrals, and whites tabs to be all you lot really need.
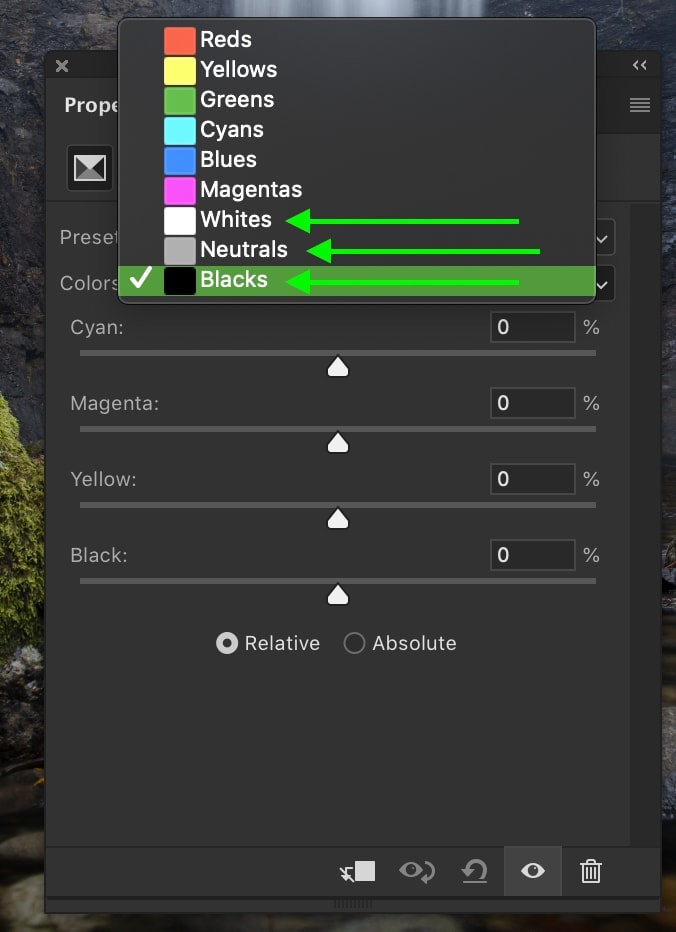
There are four sliders available in the selective color aligning layer called cyan, magenta, yellow, and black.
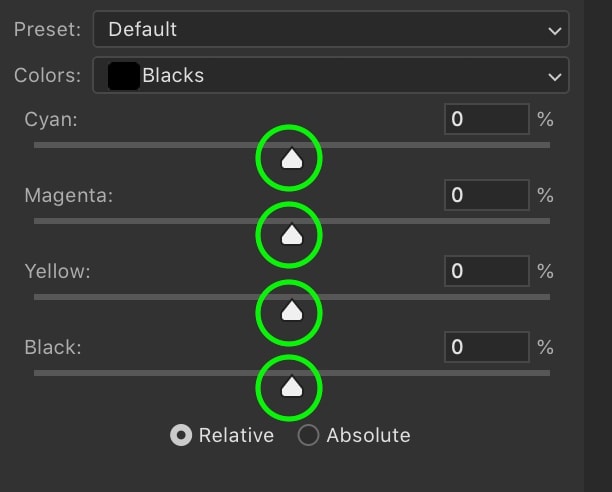
Past moving any of these sliders to the right, you'll add together more of that specific color to the photo.
If you motility the sliders left, you lot'll add all the opposite colors of each slider to the photograph. For reference, moving the cyan slider left gives yous cerise, the magenta slider gives you green , and the yellowish slider gives you blue.
Work through the blacks, neutrals, and whites tabs and arrange the iv sliders accordingly. Accept care not to become overboard with this adjustment, or you lot'll cease up with an unrealistic look.
Adjustment 2: Hue Saturation
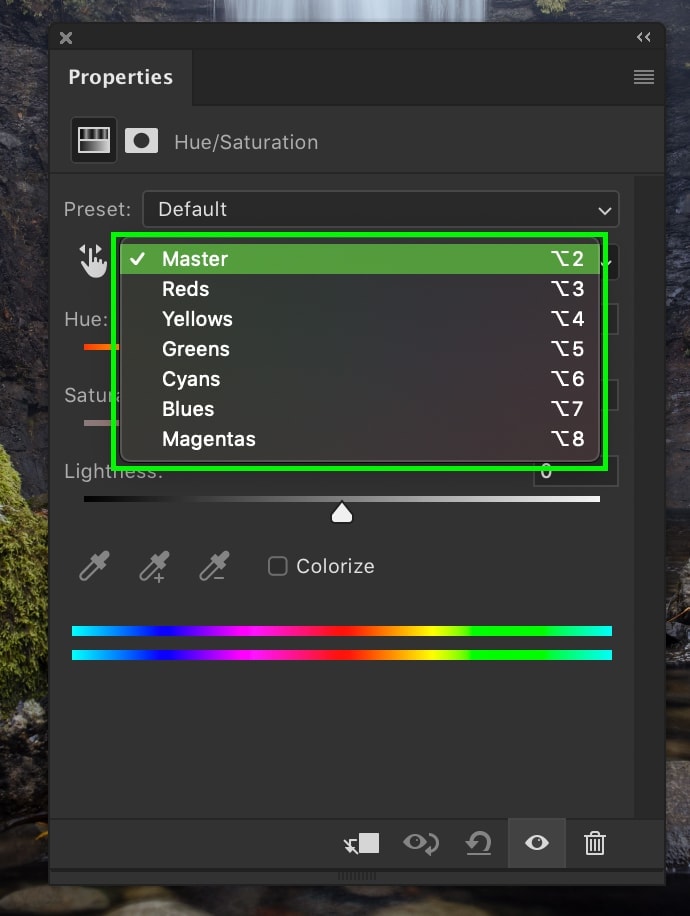
The next adjustment layer to use for editing colour is called the hue saturation adjustment. This tool lets you alter the hue of any color in your photograph to create a unique look to sure colors.

To create a new hue saturation adjustment layer, click the icon in your adjustments tab or discover it via your layers console.
Once open, click on the "master" tab to reveal your individual color channels. Working your fashion through each channel, edit the hue, saturation, and luminance, as needed.
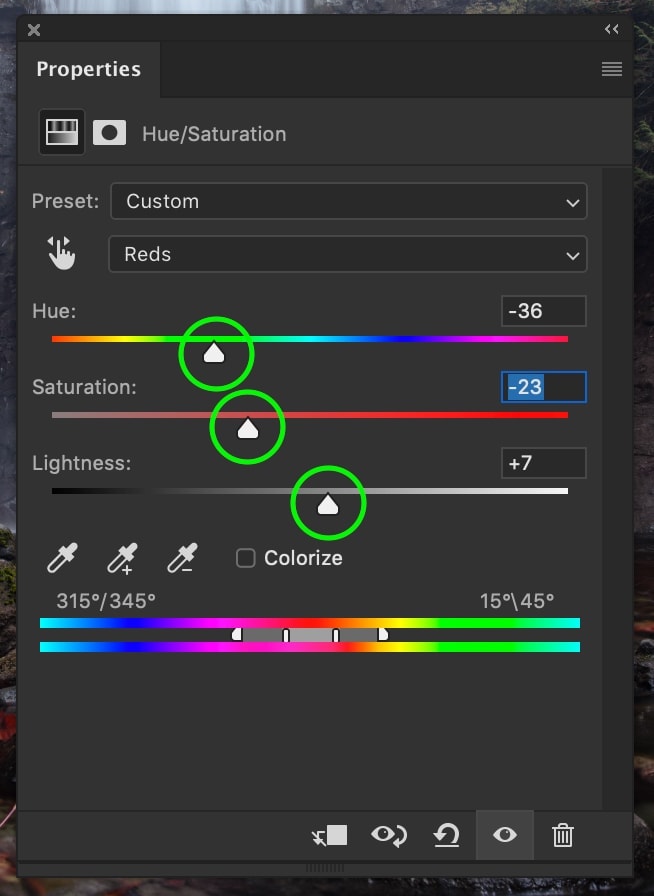
If you want to become extra artistic with your photo edit, don't be agape to alter the hue of certain colors dramatically. It's all part of the fun!
Adjustment iii: Color Balance
The final color adjustment to add is the color balance adjustment layer. This tool lets you alter the tones of your exposure ranges. Rather than targeting via color, you lot can target areas of your photo based on their exposure.

To create a new colour balance aligning layer, click the icon in your adjustments tab or find information technology through your layers console.
Once open, make sure the "preserve luminosity" is checked off. And so begin to play around with the sliders to see what types of tonal changes you can brand.
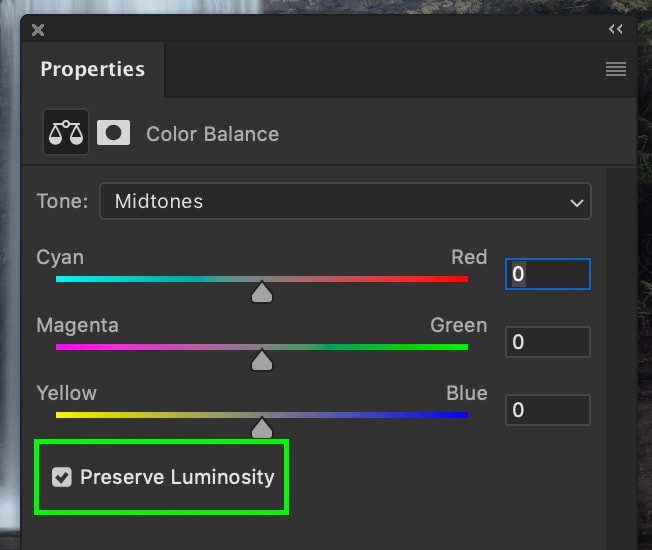
Exist certain to modify the "tone" option between midtones, shadows, and highlights to better blend your adjustments.
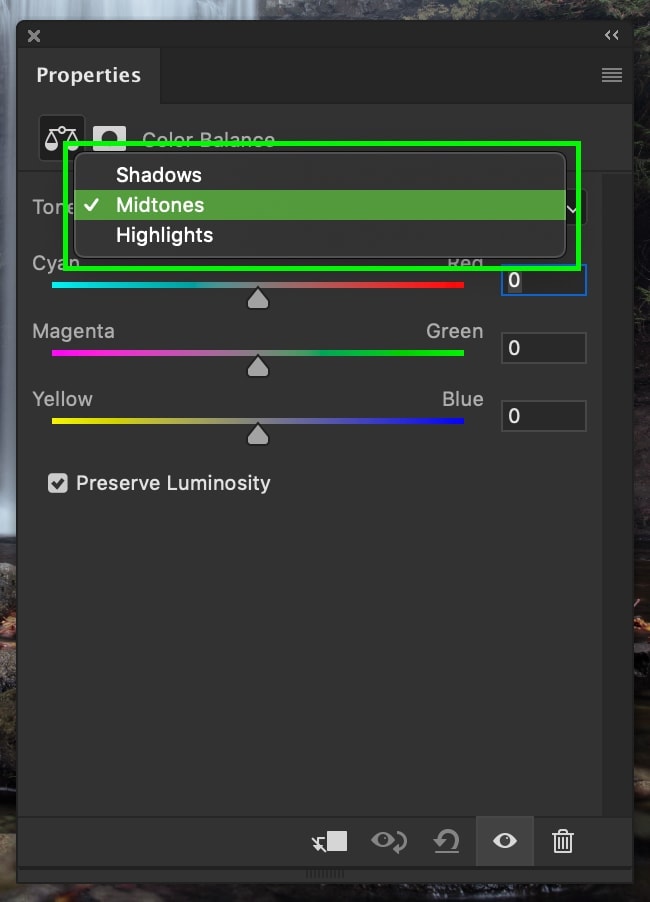
I like to start in midtones, and so edit the shadows while doing the highlights last. Whatever your workflow, just make sure to use all of the tone ranges!
– The Result Of These 3 Color Adjustments
Subsequently 3 unlike aligning layers, your photo at present has a lot more of a professional look to it. These three tools are my go-to for every photo I edit in Photoshop. Below is the before and subsequently of the adjustments made to the waterfall photo!

7. Create Spot Adjustments Using Layer Masks
Now that you've finished all the general exposure, dissimilarity, and color adjustments, at present comes the time to go specific. With spot adjustments, y'all can directly target i part of your photo (such as the sky or your subject) to adjust them as needed.
Unlike other editing programs, Photoshop doesn't take a specific "spot aligning" castor. Instead, you need to employ layer masks to control where adjustment layers are visible.
If you lot're new to layer masks, exist sure to learn the fundamentals of layer masks in order to make the most of them. For the sake of this example, I'll be using a soft brush on my layer mask to brighten the sky.
– Create An Aligning Layer
Y'all can apply any adjustment layer for spot adjustments. Even so, since I want to burnish the exposure of my heaven, I'll employ the curves aligning layer. You tin can follow this exact process with as many adjustment layers equally you wish.
To create a curves adjustment, I'll click on the curves aligning icon in my adjustments tab or detect it via my layers panel.
Since I want to do a general brightening to the photograph, I'll just elevator the exposure of the mid-tones.
With a white layer mask, the entire image volition exist brightened past the curves. To isolate its furnishings, I'll first invert the layer mask past click on the mask and pressing Control + I (Mac) or Control + I (PC).
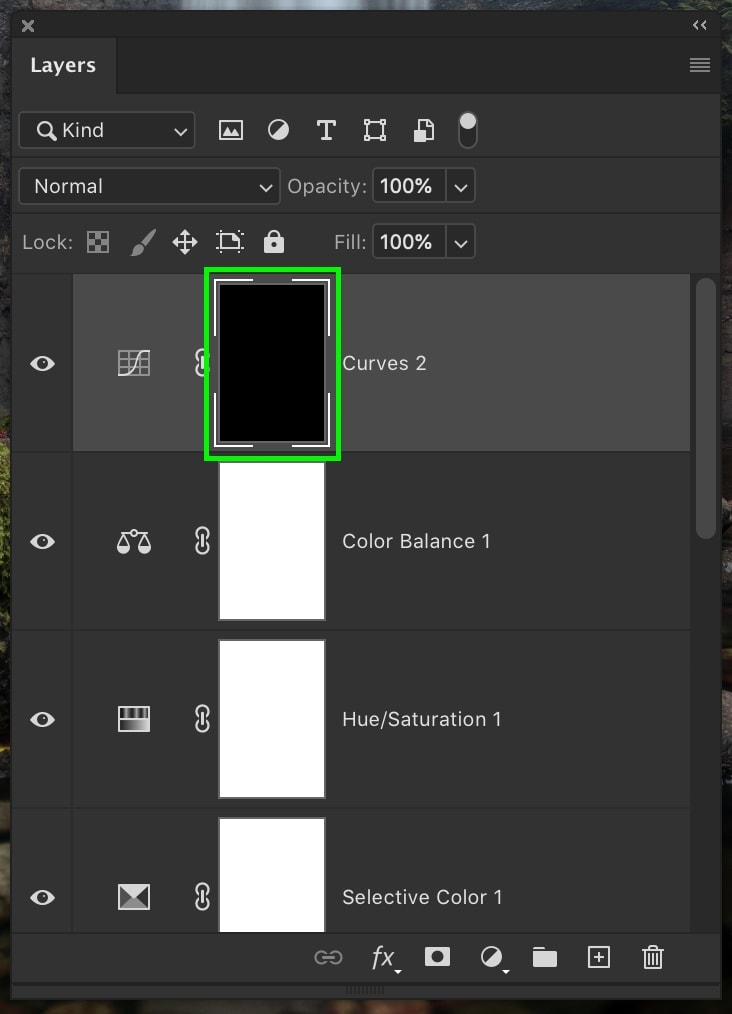
At present all of the curves adjustment volition be invisible, simply y'all tin can add together it back using a white brush.
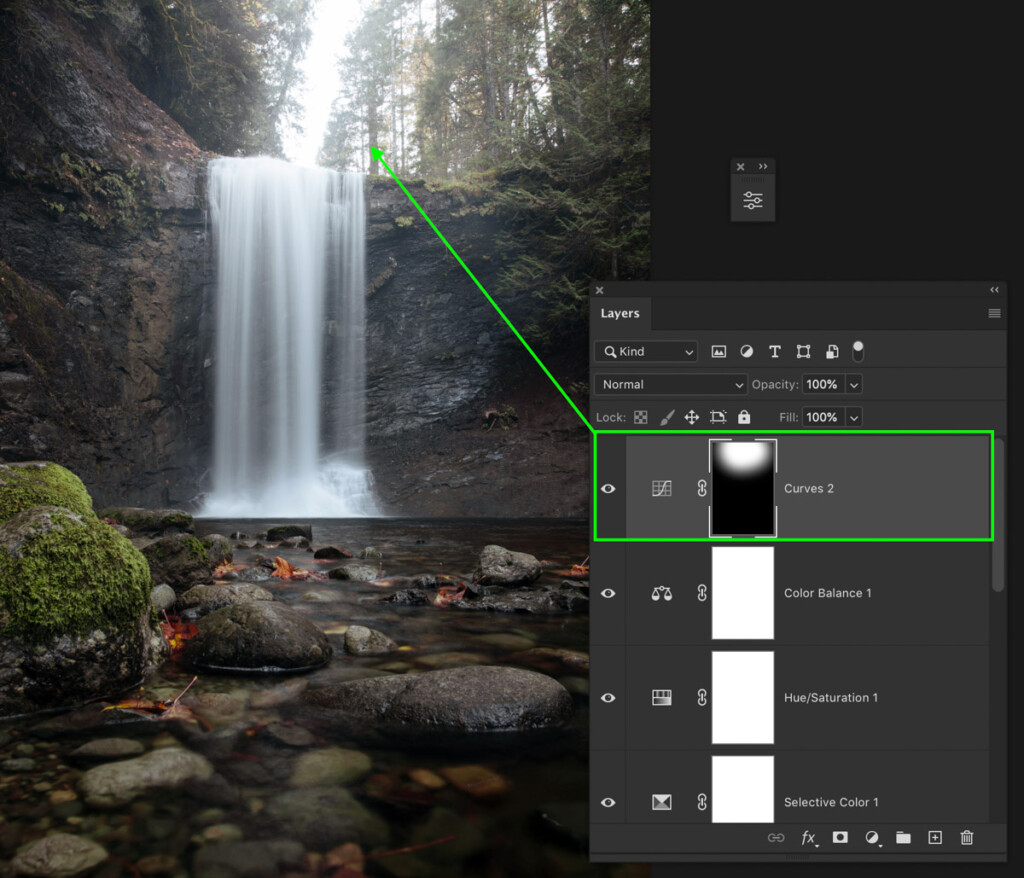
Grabbing my brush tool (B) and selecting a soft sound castor with a 0% hardness, I'll paint over the areas I desire to brighten. In this example, the heaven and nearby the waterfall. By using a layer mask, you lot become the best control in terms of isolating adjustments. You can learn more than about how to use layer masks in this post.
– What Kinds Of Spot Adjustments Should Y'all Make?
Spot adjustments are perfect for helping fix any discoloration in your photo or brighten of import areas. In most cases, brightening around your subject or concealment less important areas can add a lot to your photos.
In the above case, I only used a curves adjustment layer, but you lot tin can use the same steps with any aligning layer. Just rinse and echo the same process with whatever colour, contrast, and exposure adjustments equally needed!
8. Dodge And Burn
At this point, you are getting pretty happy with the wait of your photo. However, there's i last pace you can add to actually make it popular. This step features a technique called dodging and called-for.
In curt, dodging selectively brightens your photo, while burning selectively darkens. By swapping between these tools in Photoshop, yous can add some creative contrast.
– Create A fifty% Grey Layer To Edit Not-Destructively
To kickoff, you need a fifty% gray layer to apply your dodging and burning to non-destructively.
Printing Command + Shift + Northward (Mac) or Control + Shift + N (PC) to open a new layer dialogue box.
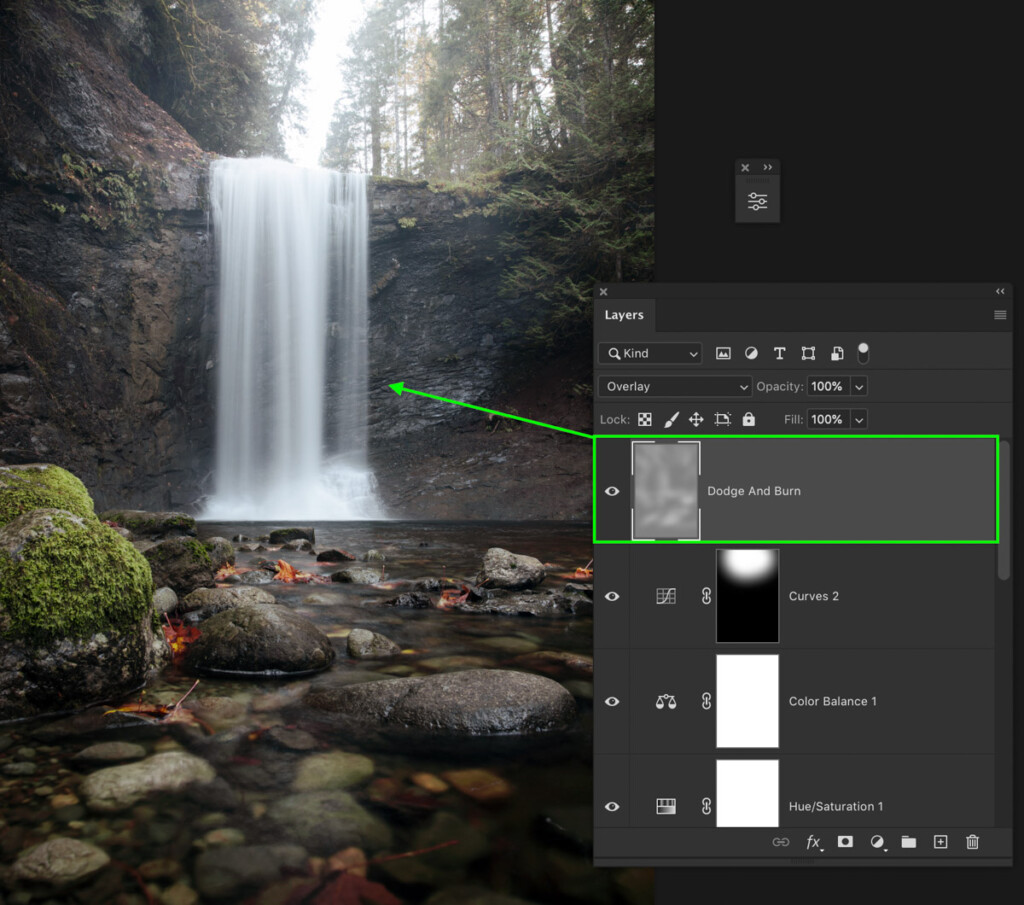
Change the blend mode to "Overlay," check off the make full with 50% grey selection, and rename the layer to dodge and burn.

– Dodging Your Image
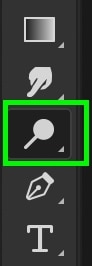
Starting with your dodge tool, press O to access it.
Looking at your settings bar, exit your range set up to "Midtones" and the exposure between 5% and ten% . The higher your exposure, the more intense your adjustments volition look. For the well-nigh realistic effects, I've found this range to work best.

With your contrivance and burn down layer selected, begin dodging any areas of your photo you want to bring more focus to. Things like your bailiwick, interesting textures, or along the horizon. If you want to brand an surface area brighter, paint multiple brushstrokes over the same area.
– Burning Your Image
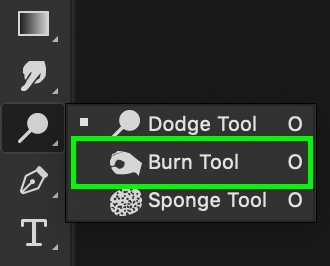
Afterwards y'all've gone through and dodged sections of your photo, click and agree on the dodge tool icon in your toolbar. Select the burn tool from the pop-up tool window.
Looking at your settings tab once again, set your range to Midtones and leave the exposure between five% to x%.

This time around, you'll be darkening parts of your photo. Paint over any areas yous don't want to stand out. Yous tin can besides burn edges of your photo that are opposite to the calorie-free source. This will make the highlights in your paradigm really stand up out and direct your centre towards the lighter areas.
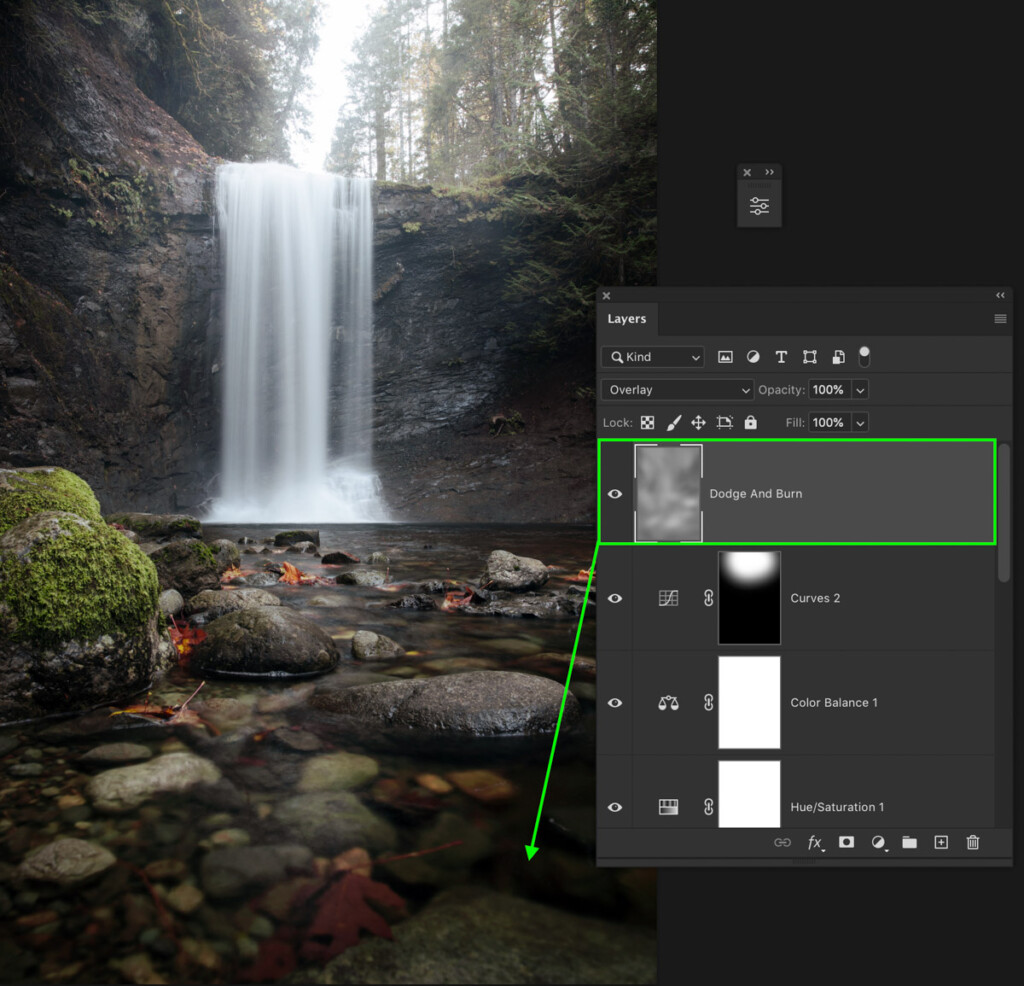
Go back and forth between dodging and burning until y'all similar the effect you're getting. If everything works correctly, you'll notice a subtle simply favorable change to how areas of contrast expect in your photograph.
ix. Sharpen Your Paradigm With A High Pass Filter
Your edit is nearly complete. The last touch is to add some sharpening to your unabridged photo. I of my favorite ways to do this is with a high laissez passer filter.
A high pass filter will enhance the border detail in your photograph. This, in plow, ends upwards making your entire photo look more clear.
Since this filter needs to be applied to an image, you'll demand to duplicate and merge all your existing layers.
Clicking on the top layer in your layers panel, use the keyboard shortcut Command + Pick + Shift + E (Mac) or Control + Alt + Shift + E (PC) to duplicate and merge all your layers.

With your newly merged layer selected, go to Filter > Other > High Pass .

Ready the radius to no more than 2 pixels and click OK. The higher your radius, the more intense the sharpening will wait.

Lastly, set your layer blending fashion from Normal to Linear Light to blend in the high pass filter.

Besides, remember to rename your layer to "sharpening" to go on yourself organized!
10. Consign Your Photo From Photoshop
At present that you've come this far, it's time for one final task in your editing process. That's to export your photograph! There are a few means to consign images from Photoshop, merely allow's get over the easiest ane.
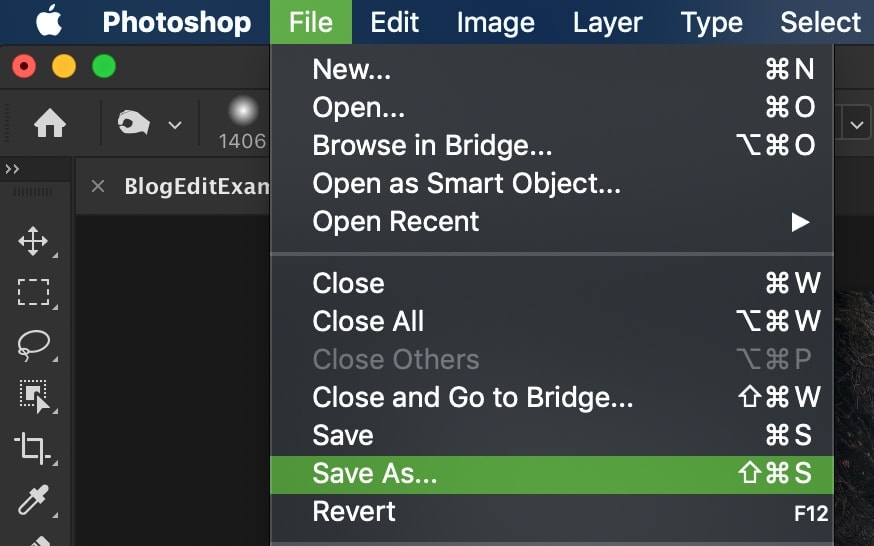
Go up to File > Salve As.
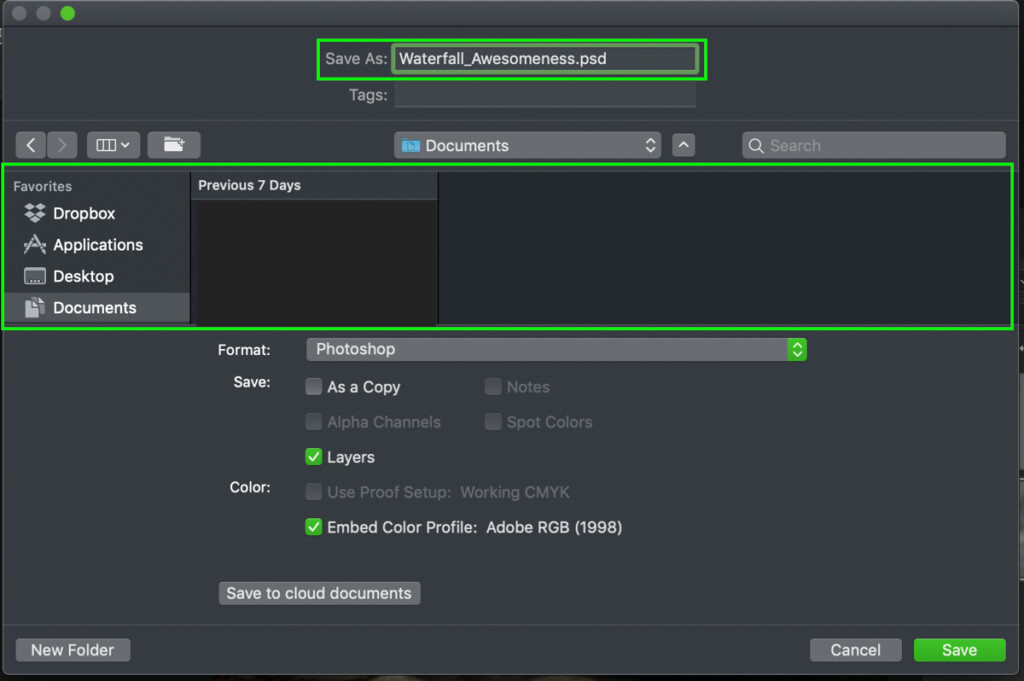
Type in your desired file name and a location on your computer to export your photo to.
Now most importantly, change the format from Photoshop to JPEG.
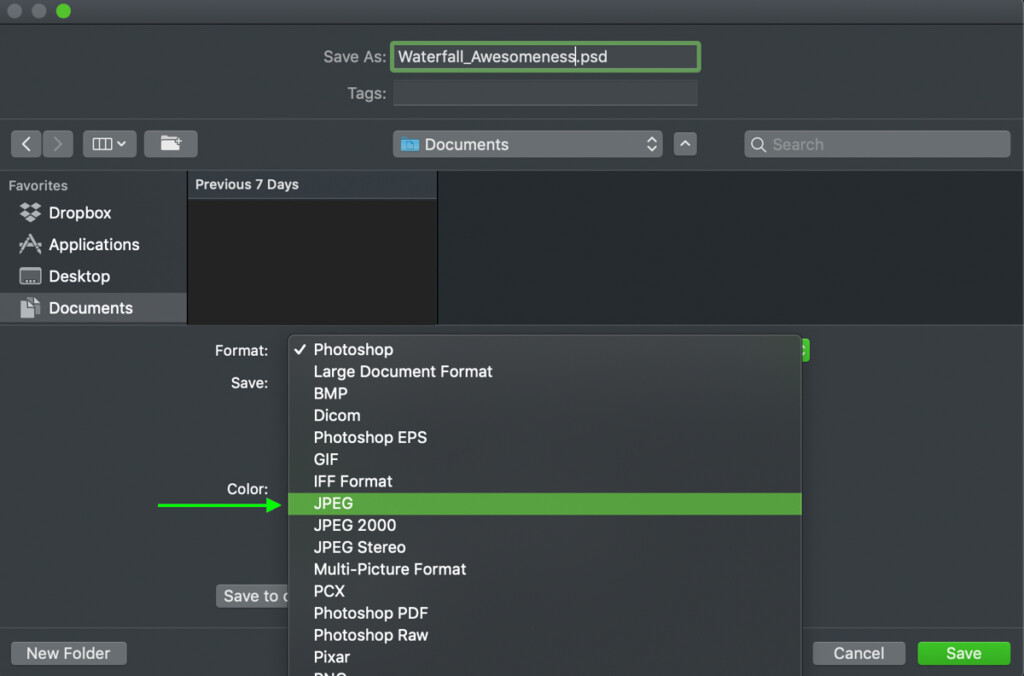
Then click salvage to export your photograph as a JPEG file!

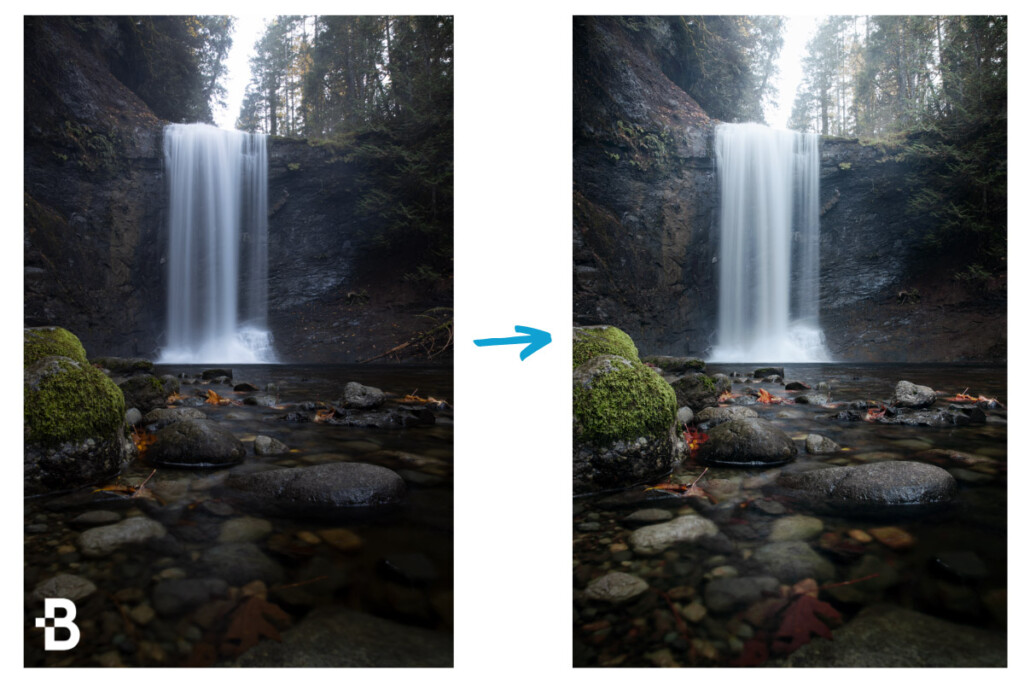
The Consequence

Afterward following the 10 steps, we've completely transformed this waterfall photo. What started as a relatively manifestly image has been enhanced to improve take hold of your center. With a handful of adjustment layers and filters, editing a photo in Photoshop is like shooting fish in a barrel!
If you're new to editing in Photoshop, this all might seem a trivial overwhelming. Just remember that with exercise and repetition, these steps will become second nature. It takes time to build a practiced photo editing workflow, but in one case you lot do, you'll breeze through the editing process with every photograph!
Happy Editing!
Brendan 🙂

How To Edit Image In Photoshop,
Source: https://www.bwillcreative.com/how-to-edit-photos-in-photoshop/
Posted by: chestnutwilen2001.blogspot.com
0 Response to "How To Edit Image In Photoshop"
Post a Comment