

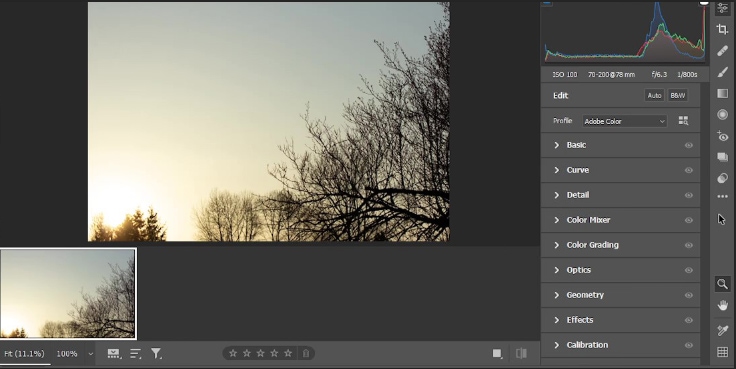
How To Flip Image In Photoshop
There are a few like shooting fish in a barrel ways to flip or mirror images in Photoshop for both creative effect and compositional enhancements. To help get you started, the following method is the easiest way to flip an prototype for fast results.
To flip a layer in Photoshop, select the layer from the Layers Panel, then press Command + T (Mac) or Command + T (Windows) to admission the Transform Tool. Once activated, right-click on your canvas and choose "Flip Horizontal" or "Flip Vertical" to flip the selected layer.
At present, this technique works well for flipping one layer at a time, but what if you wanted more options than that? Perhaps y'all desire to flip your entire canvas or brand your flip adjustments in Camera Raw. Likewise, you lot may desire to flip your image to create a cool mirrored image result likewise.
To help make sure you have all the bases covered with flipping and mirroring images in Photoshop, this tutorial volition serve as the ultimate guide! Let's go started.
How To Flip Whatever Image In Photoshop
Expanding on the steps I briefly mentioned above, allow's start with the most basic blazon of flipping which is with private layers.
First, import an image into Photoshop past pressing Command+O (on Mac)/Command+O (on Windows) or drag and drop it into the workspace.
Then, if your layer is locked, unlock the image layer by double-clicking it.

At present with your layer selected, printing Control+T (on Windows) or Command+T (On Mac) to activate the free transform tool.

With the Transform Tool Agile, right-click on the image and cull 'Flip Horizontal' or ´Flip vertical' from the flyout carte.

The layer will be instantly flipped.

Hit 'enter' or click the check box in the options bar to confirm the changes.

-

Before -

Later on
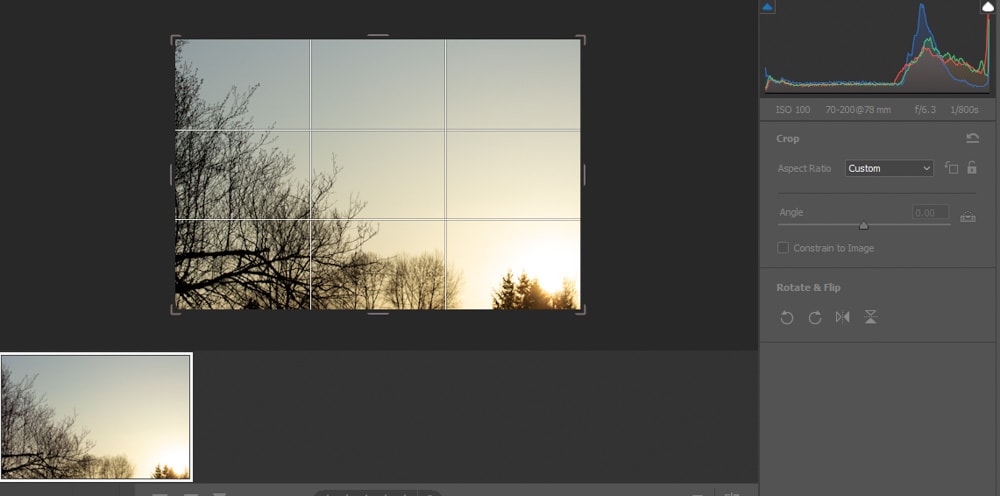
How To Flip An Image In Camera Raw
To flip an image in Camera Raw, showtime, open a RAW image into Photoshop so that Photographic camera Raw will automatically open up. In Photographic camera Raw, click the Crop Aligning, then click the Flip Horizontal or Flip Vertical choice inside the 'Rotate & Flip' settings to flip the image in one click.
If yous try to import a RAW file into Photoshop, you will notice that information technology will exist opened in Photographic camera Raw first. You tin make many edits there, including flipping the photo.
Yet, the option of flipping an image with Camera Raw is only available when you lot open the image straight into Photoshop. If you open an image as a layer and apply the Camera Raw filter, the flip paradigm option will non be available.
Then with that in listen, make certain to follow these next steps to ensure everything works!
Kickoff, open your RAW file by pressing Control+O (on Windows) or Command+O (on Mac) or dragging it into Photoshop.
Afterward that, you will see that the image will be direct imported into Photographic camera Raw.
Inside Camera Raw, click the Ingather Tool on the correct side of the panel.

You can make any type of ingather adjustment here forth with, straightening and flipping adjustments.
Since we're focused on flipping the image, let'southward go to the 'Rotate & Flip' section.

By clicking either of these options shown above, the image will be flipped instantly.
-

Before -

Afterward
How To Flip The Entire Sail Horizontally Or Vertically
To flip your unabridged canvas horizontally or vertically in Photoshop, go to Epitome > Paradigm Rotation and choose the "Flip Canvass Horizontally" or "Flip Sail Vertically" option. This will flip your canvas and all its contents according to your selected flip aligning.
So let's say you lot have finished your projection and want to flip the entire canvas to give it a unlike limerick. Rather than flipping individual layers, you lot can flip the entire canvas with a unmarried click. Talk about a time saver!

To exercise this, go upward to Image> Image Rotation> 'Flip Canvass Horizontal/Vertical.'

The entire canvas will exist flipped horizontally or vertically, depending on the option y'all choose.
-

Horizontal Sail Flip -

Vertical Canvas Flip
Flipping the entire sail is different from flipping individual or grouped layers because when you lot flip the sail, y'all flip everything on it at in one case. You don't even need to have any layers selected to do that.
When you flip layers, on the other manus, you need to select them starting time.
This technique is very useful when you lot need to take a quick look at how your project looks from a different angle. Yous tin can easily flip it back to its original position by repeating the same steps.
How To Flip A Single Layer Without Flipping The Entire Canvas
One of the advantages of using Photoshop is that you work with layers. Ideally, every element in a composite needs to be on its own layer, and so you can select a target layer and make individual adjustments to information technology.
So that ways, if you lot want to flip a layer, you lot demand to select it first. Then, when you apply your flip adjustment, the other layers on the canvas will remain untouched.
In the example below, I used some images to make a blended. Notice that every element in the composite has its own contributor layer. And then if I want to edit the moon, for example, I will have to click on its layer first.

With the layer selected, I will hit Control+T (on Windows) or Command+T (On Mac) to activate the free transform tool.

Then, I will choose 'Flip Horizontal' from the flyout menu. Y'all could likewise choose to flip vertically as well!
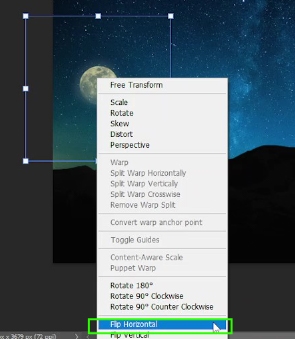
The selected layer will be instantly flipped after that action. After flipping the desired object, I will striking 'enter' to confirm the changes or click the check box in the options bar.

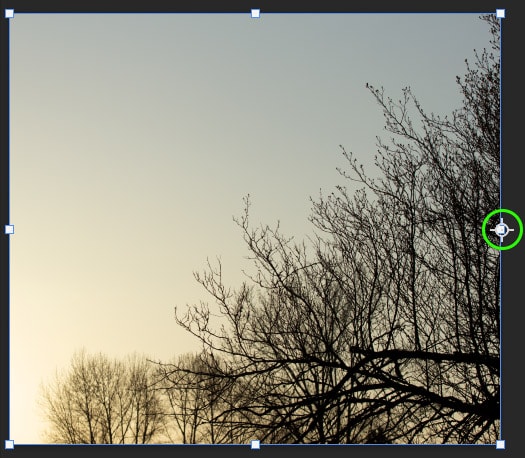
Discover that every other element in the composition remains in its original position. That's because I flipped a specific layer!
-

Earlier Moon Layer Flip -

After Moon Layer Flip
How To Mirror An Image In Photoshop
In that location are many ways to brand a mirror outcome in Photoshop, but let's focus on the ii most simple ones.
Method 1: Manually Mirroring The Image
To mirror an image using this method, import the desired image into Photoshop first. Yous can do that by pressing Control+O (on Windows) or Command+O (On Mac), or past dragging information technology into Photoshop.

Then, unlock the paradigm layer by double-clicking it.

After that, I would advise yous to take a look at the prototype you have, to determine if you want to mirror it the way it is or crop out whatsoever parts yous don't want.
To ingather the image, grab the crop tool from the toolbar or hit 'C' on the keyboard.

Then, elevate the grid handles to crop out the part of the image you don't want. Everything exterior the ingather overlay will be left out.

When you're finished, press 'Enter' to confirm the changes.
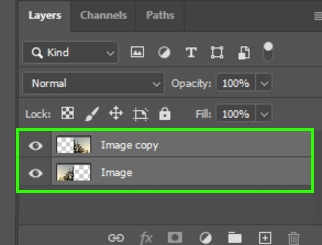
Afterwards that, you can press Control+J (on Windows) / Command+J (on Mac) to indistinguishable the paradigm layer.

With the duplicated layer selected, press Control+T (on Windows) / Command+T (on Mac) to activate the complimentary transform tool.

Then go up to the Options bar and check the reference point check box. This pick will ensure the prototype is mirrored from the position of the anchor.

Find that subsequently doing that, the reference indicate will exist located in the centre of the prototype.

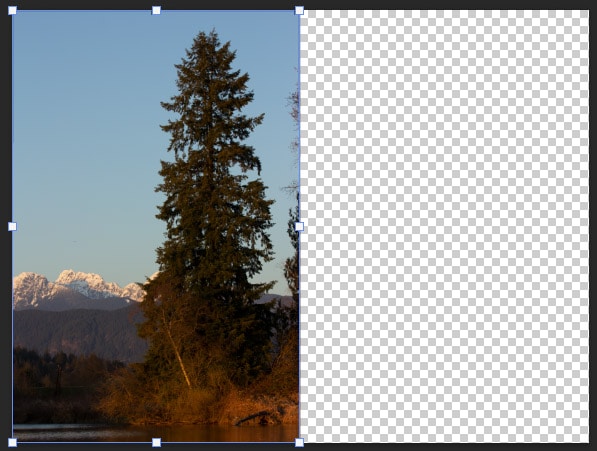
Since you want a mirrored image, the reference betoken can't be in the middle. Instead, information technology should lie on the border of the original image and its reflection. Then nosotros will motility the reference point to the edge of the image by clicking on information technology and dragging it to the border.
At present, let'due south flip the image past right-clicking with the mouse and choosing 'Flip horizontal' from the flyout bill of fare.


You lot can see that the reference point is between the 2 images. However, the mirrored image is not visible since it'south across the cropped area.
Luckily you lot can reveal the full paradigm by doing the post-obit.
Start, hit enter or click the checkbox in the options bar to disable the costless transform tool.
Then, get up to Paradigm > Reveal All.

The mirrored paradigm will be instantly revealed.

Observe that in that location are still 2 layers in the layers panel, fifty-fifty though it looks as if there is only one epitome in the result. To turn the two image halves into one, click on one layer after another while belongings 'shift'. This will select both layers at once.
After that, correct-click and choose 'Merge Layers' from the flyout menu.

And so, the layers will become i and you will have a single epitome out of the original image and its copy.
Turning both images into one may be helpful, for example, when you want to modify the dimensions of the resulting epitome afterwards.
-
Before -

Later
Method 2: Changing Canvas Size To Mirror
This method is slightly different from the previous one but produces the aforementioned event.
Get-go of all, import the desired image into Photoshop, as you learned earlier in this tutorial.

Then, unlock its layer by correct-clicking it.

Next, go up to Image > Canvas Size.

In the console that appears, you will enter some new values for the canvas. The idea here is to make room for the mirrored image.
Start past changing the unit of measure to percentage.

Then, uncheck the Relative box.

Later that, set the width to 200 and the height to 100. Nosotros are basically doubling the canvas width and keeping its height every bit it is. Click 'ok' when you're finished.

That's how the canvas will wait afterward doing that.

Now, drag the epitome to the left by making sure it's selected in the Layers Console and using the Move Tool (Five) to reposition it.
Next, make a copy of it by clicking Command+J (On Mac) / Command+J (On Windows).

Now, with the image copy selected, hit Control+T (On Mac) / Command+T(On Windows) to activate the transform tool. Then, right-click on the image and choose 'Flip Horizontal.'

You will notice that the image will be flipped instantly.

Click 'Enter' on your keyboard to disable the transform tool. And then, with the Move Tool (Five), drag the epitome copy to the right to complete the mirrored effect.

-

Earlier -
Afterwards
Flipping and mirroring images in Photoshop is easy with the different techniques you learned here in this tutorial. In nearly cases, the free transform tool will get the job done since yous can flip the image in just a couple of clicks. All the same, if you lot want to mirror your photos, things get a little more than complicated with some added steps. Luckily with the two mirroring techniques, you learned here, yous tin can cull one that better fits your style of workflow!
Happy Editing!

How To Flip Image In Photoshop,
Source: https://www.bwillcreative.com/how-to-flip-images-and-layers-in-photoshop/
Posted by: chestnutwilen2001.blogspot.com
0 Response to "How To Flip Image In Photoshop"
Post a Comment